Steve Johnson Modelmaker
|
Back to
BR Locomotives
|
Class 303/AM3 Glasgow Blue Train
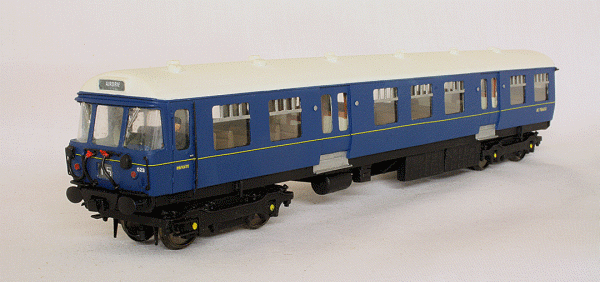
Class 303 BDTSO Completed The Class 303/AM3 three car multiple units were built in 1959 by Pressed Steel for use on the North Clyde and Cathcart Circle electrified lines. Originally painted in British Rail Caledonian Blue, they earned the nickname of 'Glasgow Blue Trains'. As an iconic EMU design, they have long been a 'must have' in my collection, even though my layout isn't remotely Scottish based! After a very long period, I have eventually managed to acquire the necessary body parts from DC Kits. Well done to Charlie for sorting them out!
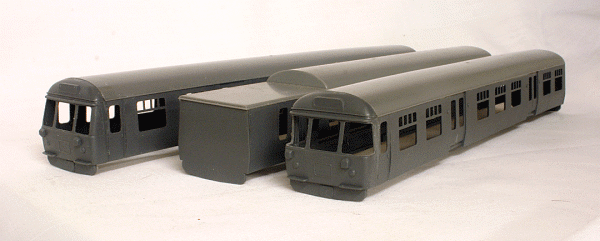
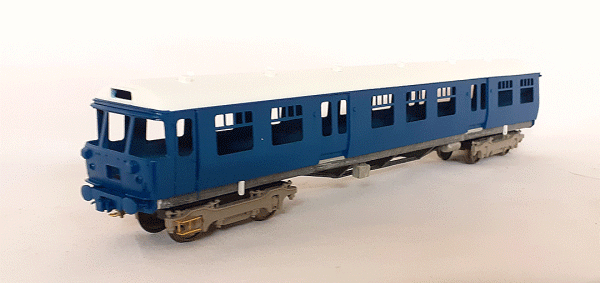
Bodies assembled. Near DTSO has modified wrap round windows, far DTSO is as supplied The first job was to assemble the bodies using a plastic weld solvent. As supplied, the driving cabs feature the later flat front cab windows. Obviously I wanted to model them in original condition, so the windows have been carefully filed back to the wrap round style. The photograph above shows one as supplied cab and one modified cab. Further modifications will include opening out the headcode panel and destination indicator so they can be illuminated. The two rear tail lights will also be opened out. DC Kits have thoughtfully provided some 'drill starts' on the inside of the cab fronts as a guide for hand rail location and MU jumpers etc. These have been drilled out. No chassis parts were supplied, but the Gresley bogie sideframes were. This is a great help as the motor car has quite a different pattern sideframe not easily available. As the units are based on the BR Mk.I underframe, I have used the Replica Railways 64ft. suburban chassis suitably modified. For bogies, I used the Southern Pride standard 8ft. 6in. nylon shell with the side frames overlaid. The same way as I have done with a lot of other multiple units. I have used Peters Spares 14mm wheels (PS84, the one side insulated type) which enable me to use the DCC Concepts pick springs that fit over the axles. This enables all cars to collect power and provide working carriage, headcode and tail lights. There is, of course, a difference in fixings for the Southern Pride bogies and Replica Railways chassis. This has been worked around by sleeving the bogie pivot with plastic rod drilled out to accept 8BA bolts.
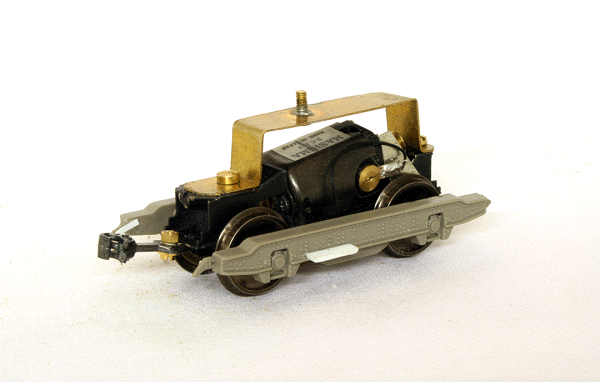
Motor Bogie using High Level Lo-Rider Motorising the unit is another problem. Usually I would have used a Black Beetle motor bogie, but these seem to be unavailable. The Tenshodo isn't really up to it. However, High Level Kits make a Low Rider motor bogie designed as a multiple unit replacement. I thought I would try one of these with the 27:1 ratio gears. It should be a good option here as it doesn't intrude into the car space very much. In any event, it will be fitted to the brake end of the motor car. Coupling the cars together presented another problem. There isn't really a good fixing mount on the LoRider bogie. Perhaps it is intended to mount the coupling on the underframe? My preference is to use Kadee couplings if possible. These have the advantage of looking like a buck eye coupling and allowing the cars to be easily coupled and uncoupled, especially those fitted with corridor connectors. The SMP bogies come with a stepped coupling adaptor designed for use with their own tension lock. However, with minimal adaptation, I can use a Kadee No.148 coupling with gearbox. A little bit of the bogie moulding on the transom has to be removed at the end to enable the gearbox to fit flush. The gearbox is simply glued into place and when set, the coupling and retaining plate fitted. There is a bit of adjustment available in the adaptor, but the centre setting was fine for my coupling distance. A Kadee No.18 was bolted to the motor bogie in a hole widened to take a 10BA bolt. I usually cut the tails off the coupling as I am not intending to split the unit. There is a bit of inner end detail to model on these units. As supplied, they are completely blank. Additional details are the jumper cables and sockets, Communication cord apparatus and 'tell tales' and on the motor car, a high tension box and small plate under the pantograph at the brake end.
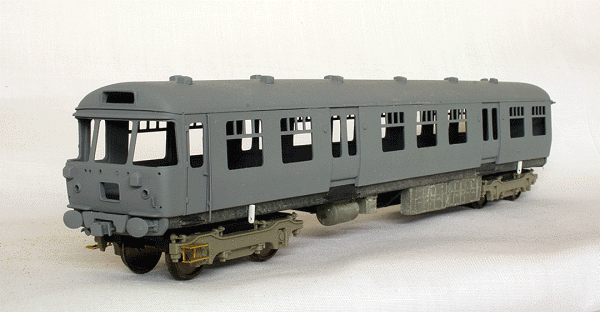
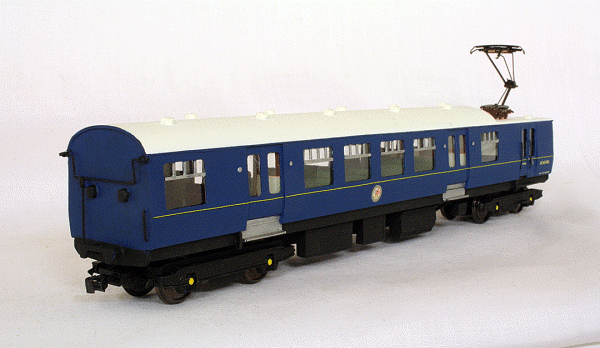
BDTSO Body in primer, chassis still needs attention The pantograph is always a problem for us 4mm scale modellers as there are no 4mm scale pantographs available! The nearest would be to try and acquire a Bachmann spare part off their Class 85. So, we are usually stuck with using underscale HO scale pantographs. Sommerfeldt are usually my favourites as they do make a Stone-Faiveley AMBR type. However, the Class 303 has a slightly different version with a centre rod from the knuckle to underneath the centre of the pan head. The nearest I could find to this, is a Märklin 7219 pantograph, which is available as a spare part. Underframe equipment came from an eBay supplier. I have used these 'generic' parts on the Class 309 amongst others. They are not quite right as supplied and a few other bits were added or modified. The bogie steps are my own etchings. Phoenix-Precision Paints actually make the correct shade of BR Caledonian Blue for these units in the form of P145. The roof colour is a little more tricky. It is described a being white or silver with most photographs showing it a dirty dark grey. I decided to go with white as the repainted unit 303 048 had a white roof. The underframe is black. Handrails, pipes and jumper cables were added and painted black. Lining is Fox Transfers yellow/black lining lengths intended for some LMS carriages. Carriage numbers are from the excellent HMRS Methfix range. The set number is from some 1mm high white transfers I had from a war gaming supplier. With everything applied, it was all sealed with a coat of Precision Paints satin varnish. The interior was now painted. White for the ceiling and a mid wood colour for the panels.
First coat of paint With the bodies now complete, it was time to add glazing. The sides are simply sections of clear acetate glued into place with Glue'n'Glaze. The headcode panels also had a small rectangle of acetate fixed in position. The drivers screens were a little bit more tricky. This involved cutting a strip of 5 thou clear acetate and carefully trimming it so that it would fit in behind the frames and get that characteristic wrap round curve. Several attempts were made before I was happy with it. The headcode numbers and destinations were printed out on my computer to the right size and fixed in position behind the 'glass'. Two short lengths of red acrylic light rod were cut to length and fixed in position for the tail lights. Red pre-wired nano LED's were glued behind these. Plasticard boxes were created to fit behind the headcode and destination panels. A pre-wired white nano LED was fitted to the rear of each box. Carriage lighting used a warm white self adhesive LED strip fixed to the ceiling. This was wired up to one of my 'flicker free' circuit boards. A function only DCC decoder was fitted to the ceiling just behind the driving compartment. The headcode/destination and tail light LED's were wired up to this and the feed wires running along the ceiling to the 'flicker free' board. All the lights were then tested before continuing. Seating was the next item. False floor panels were made up and the seats glued to these in the correct positions. Reference to a seating plan was essential as some is 2+3, others 2+2, some sideways by the vestibules and a five seater at the carriage end. Vestibule dividers were cut out of plasticard and fixed to the ceiling, making sure they didn't foul the floor. When happy with all this, they were painted. The Motor Car also had a Digitrax DH126 decoder fitted for motor control.
The MBSO It was now time for final assembly. Fairly straightforward, but remembering to solder the pick up wires to the carriage power wires. Everything worked as expected, but one Driving car needed its decoder direction reversed. The only remaining item, or problem, is the pantograph area. The roof area still needs the various insulators and air blast circuit breaker fitted. The problem is, where do I get these bits from? I'm probably going to have to see about getting some 3D printed as I have a number of EMU's in need of these now. I am very pleased at eventually managing to acquire, build and complete one of these iconic EMU's. Now for some OHLE!
DC Kits made a kit of this class of course. Brittania Pacific Models make a RTR model of this class in various liveries.
|
