Steve Johnson Modelmaker
|
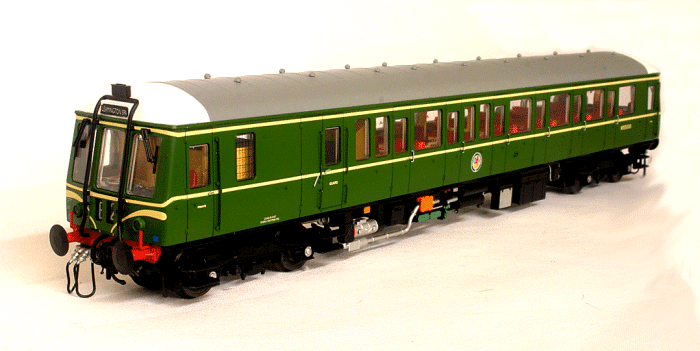
Class 122 Gloucester RCW Single Car Gloucester Railway Carriage and Wagon Co. Ltd. built twenty of these single car multiple units to a BR Derby design in 1958 for the London and Birmingham areas of the Western Region. They were allocated the TOPS Class of 122 and along with the Pressed Steel Class 121's, were nicknamed 'bubble cars'. Ten driving trailers were also built, being allocated the TOPS Class of 150. These units became quite long lived with some lasting to 1994. Five were preserved and a number remained in Departmental use.
My version is the Dapol model, announced in December 2012, in original condition and numbered W55000. It is a very nice model of one of these iconic vehicles with a few nice features. The green looks a little strange to my eyes, but I am assured that this is a good match to original green that they were painted in rather than the later, darker, multiple unit green. The destination blinds are supplied blank, as are the headcodes. However, there is a sheet of waterslide transfers containing various typical destinations and headcodes. The destinations are applied on top of the blind. The headcodes are applied by removing the headcode surround, carefully, before fitting and replacing. The pack of parts contains some replacement headcode panels. There is an array of lighting, for which DCC is advised for best effect. There are the usual head and tail lights. The tail lights on this version of the model are not really correct as a red oil lamp would have been used. Electric tail lights came in much later in the 1980's. When the headlights are on, the headcode panel and destination blind also light up. In addition to all this, there are separately controllable cab lights and carriage lights. The body of the model simply unclips from the chassis. When this is done, a small black blanking plate, marked DCC, in the guards area is revealed. This cover unclips to show the DCC decoder fitting area. At first, it looks as if there isn't a blanking plate fitted, but it is! This gently levers out to reveal the 21MTC socket. It is recommended to use a decoder with five or more functions and there seems to be a few problems with this. It appears that there are two 21MTC standards, one with F3 and F4 as logic level outputs and one with full voltage outputs, depending on whose make is used. In this instance, a logic level output is not going to switch the lights on. I had a look around and decided to use a LaisDCC 21MTC six function chip. Not everyone's favourite I know, but cheap enough to experiment with. It is also reckoned that the LaisDCC chips are very similar to TCS chips and I knew that these worked in the unit. So, I installed the LaisDCC chip and everything worked as it should! So, the functions are as follows: f0 = controls the head/tail lights f1 = switches the brake end cab lights (No.2 end) f2 = switches the non brake end (No.1 end) f3 = turns the carriage lights on and off Further fettling of the chip included altering the inertia and braking. I will also swap around the No.1 and No.2 end cab light functions. The No.2 end on a 'Bubble Car' is the Brake End. All in all, a vey nice model. Craftsman Models produced a conversion kit based on the Lima Class 117. Westdale Coaches offered a kit of this class. Chris Leigh once offered a conversion kit for the Lima Class 117 to a Class 122. Anbrico produced a kit of this class some years ago. |
|
