Steve Johnson
|
Back to BR Locomotives
|
GWR 15100,
English Electric, Hawthorn Leslie
0-6-0DE
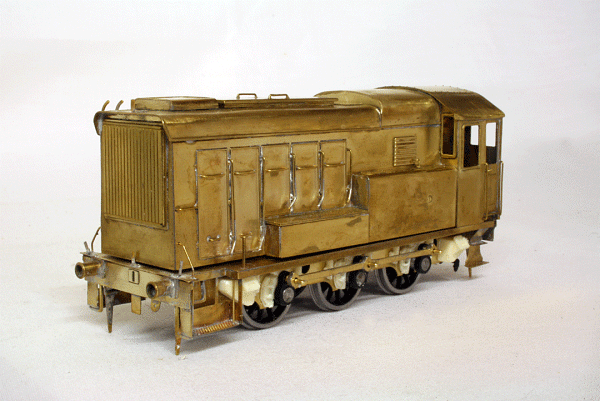
15100 15100 was a stock English Electric/Hawthorn Leslie design shunter of 1935 similar to the ten supplied to the LMS. Two of the LMS versions survived to become BR 12000/1. Delivered to the GWR in 1935, the locomotive was painted in GWR lined green with a red buffer beam. It sported the GWR Shirtbutton logo and was numbered No.2. With nationalisation, No.2 became BR 15100 and was later painted black. I decided to have a go at building the Judith Edge Kits etched brass kit of this locomotive. It follows Michaels usual method of construction with separate chassis, footplate and body assemblies. There is a slight difference here as the real 15100 had outside frames, the kit features these, but also includes a chassis to make motorising and mounting the wheels a bit easier.
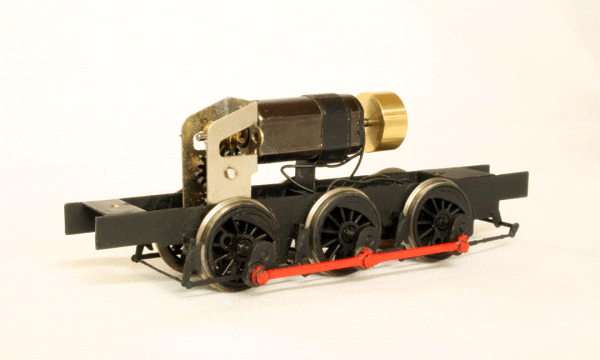
15100 almost complete The kit goes together quite easily and soon produces a recognisable locomotive. The chassis can be fitted with either Alan Gibson wheels, extended axles and outside cranks, or the Romford wheels on extended axles and the etched cranks in the kit. The instructions advise that the Gibson wheels are more accurate, so I have used these initially. I always have problems with Gibson wheels and did with this model. The axles are friction fit pushed through the plastic wheel centres. Despite using a pillar drill to get everything square, I still ended up with one wheel being eccentric on the axle causing a wobble. A new wheel cured this. The cranks are friction fits on the ends of the axles. I usually use the Romford crankpins in Gibson cranks as I find they are easier and more like a proper crankpin in size. This does mean having to drill and tap the cranks to accept the crankpins. Having tried doing all this, I ended up with a very poor running chassis with the cranks constantly slipping and losing the quartering. In the end, I gave up and ordered some Scalelink wheels, Romford extended axles and Markits Deluxe outside cranks. The cranks presented a problem at first as there were no instructions. So having got them on, how do you secure them? My answer was to use a 10BA nut threaded onto the axle behind the crank. When the crank was correctly quartered, I ran the nut up tight to the inside face of the crank, securing it with Loctite. This has worked and produced a usuable chassis! The chassis is powered by a Mashima 1024 motor driving a High Level Loadhauler gearbox with 60:1 gearing and Branchlines flywheel. There was a slight problem in that the final gear, mounted on the axle, fouled one of the chassis spacers. This had to be filed back to allow the gear to rotate freely. With this done, the chassis was painted, varnished and assembled. After some tweaks with the quartering, a running chassis was produced.
Completed Chassis I originally fitted a LaisDCC decoder to the chassis but the performance was terrible. This was a bit disappointing as I have had good results from these decoders in the past. I replaced the decoder with one of my favourite brands, a Digitrax decoder. The one I used is a DN136PS. This is quite a small decoder, intended for N and HO gauges, but has the current capacity needed for this shunter. Being small, I was able to slip it in between the frames below the flywheel. The blue and white wires were left free to power the cab interior lighting.
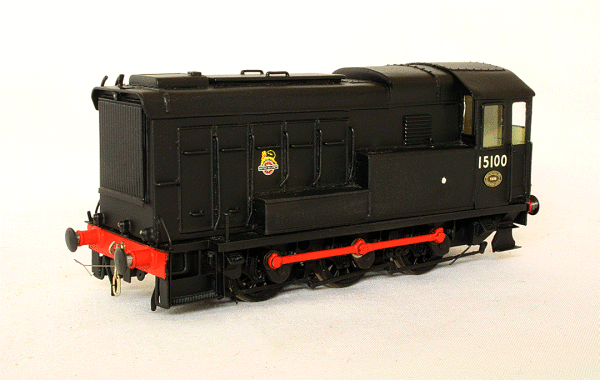
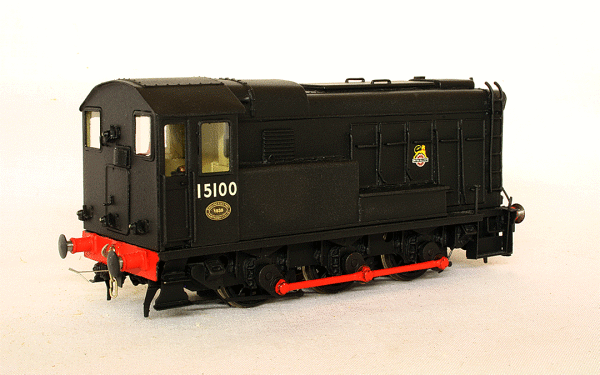
15100 in grey primer The above picture shows the model in grey primer, my usual Halfords spray can. Don't worry about the gap between the body and footplate, it's not bolted together yet! The body looked fairly tidy with only minor corrections to make, so the next move was to paint it gloss black, the beams being red of course. When dried, I painted the cab interior in cream colour, with the controls picked out appropriately. There isn't much other decoration to the body in this livery, just the cabside number and 'cycling lion' logo on the doors.
15100 So 15100 complete. The last item was the rather large works plate fitting beneath the number. I have had this custom made by Narrow Planet, highly recommended. A quick reprogram of the decoder will sort out the cab lighting switching and to fettle the performance.
|